Deploy a Countdown Workflow to Google Cloud Run
In this tutorial you will create a countdown notification system using Resonate and ntfy.sh, deploying components to Google Cloud Run and Cloud Functions.
- Deploy a Resonate Server to Google Cloud Run.
- Deploy the countdown workflow as a Cloud Function.
- Subscribe to a ntfy.sh topic to receive the countdown notifications.
- Trigger the countdown using the Resonate CLI.
The finished setup lets you kick off a long-running countdown that posts a message every x minutes.
What makes the result of this tutorial really cool?
- The result is a long-running "logical" process that exists over short-lived "physical" executions, specifically in the context of a Google Cloud Function environment that expects the function to complete quickly.
- The same mechanics that enable long-running "logical" processes over short-lived "physical" executions are the same mechanics that make the countdown a Durable Execution.
- The simple procedural code you write locally is the same code that runs in the cloud.
Prerequisites
- A Google Cloud project with Cloud Run, Cloud Functions (2nd gen), and Secret Manager enabled.
- The gcloud CLI authenticated for your project.
- The Resonate CLI (
brew install resonatehq/tap/resonate), more installation options are in the Run a Server guide. - Node.js 20+ locally (for bundling the Cloud Function).
- A ntfy.sh topic or any webhook endpoint that should receive countdown messages.
System architecture
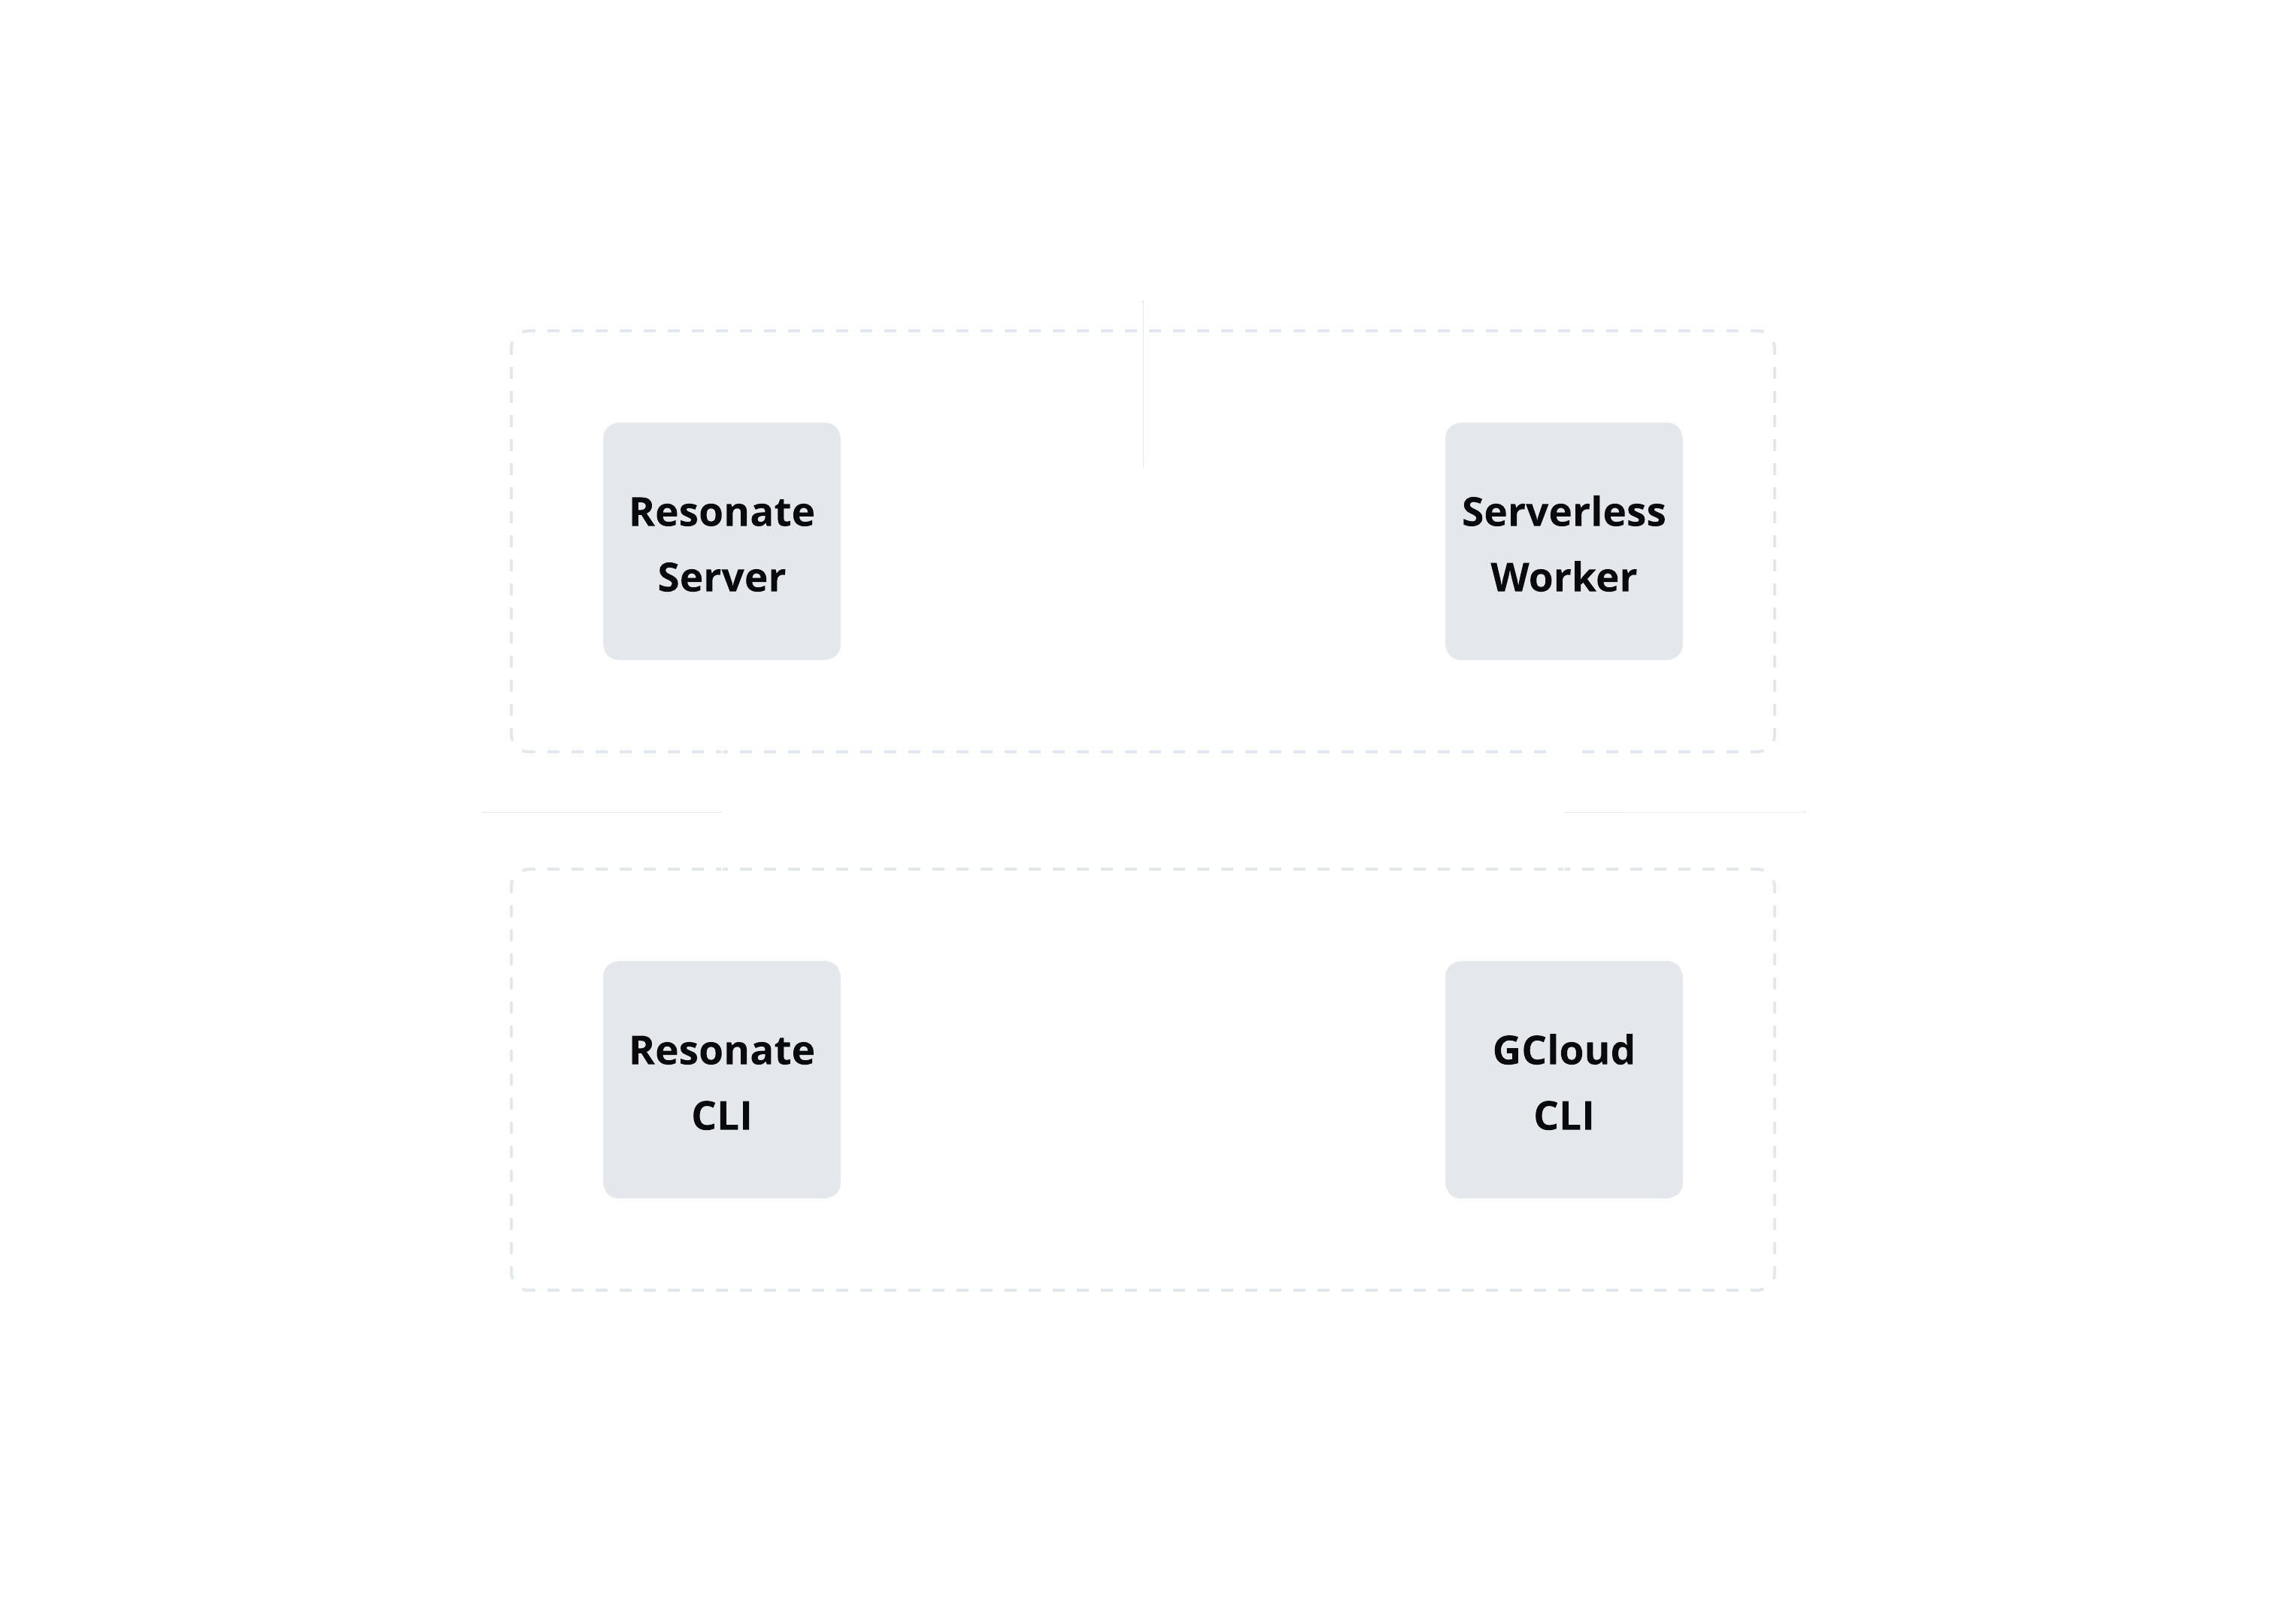
You'll use the GCloud CLI to deploy a Resonate Server as a Cloud Run service and a countdown workflow as a Cloud Function (serverless function)
The Resonate CLI enables you to invoke the countdown workflow via the Resonate Server.

The Resonate Server sends the invoke message to the Cloud Function, basically calling it like a webhook. The Cloud Function runs, storing state (checkpointing) via promises in the Resonate Server. Whenever the Cloud Function runs, it starts from the beginning of the countdown function, replaying everything up to the current point, but using the stored state to skip over already-completed steps.
As you will see below, Resonate makes it incredible straight forward to write a locially long-running worklow like this that can pause and resume without holding onto compute resources.
Deploy the Resonate Server
To deploy the Resonate Server on Cloud Run, you will use the GCloudud CLI to create a new service within your project using the official Resonate container image (resonatehqio/resonate).
The @resonatehq/gcp package that Resonate provides for Cloud Functions does not yet support auth.
Auth support is planned, but if you have an immediate need please reach out on Discord or GitHub.
So, for this tutorial, you will need to deploy both the Resonate Server and the countdown Cloud Function with --allow-unauthenticated.
And it is recommended not to keep the services live longer than needed to complete the tutorial.
When there is auth support, this tutorial will be updated accordingly.
You will need to run the following command twice:
The first time you deploy the Resonate Server, you will not yet have a server URL to pass to the --system-url argument.
After the first deployment, you will get the service URL from the output and then re-deploy the Resonate Server with that URL.
First deployment
Run the following command, replacing <your-region> with your desired GCP region (e.g., us-central1):
gcloud run deploy resonate-server \
  --image=resonatehqio/resonate \
  --region=<your-region> \
  --platform=managed \
  --allow-unauthenticated \
  --port=8001 \
  --args="serve"
  --scaling=1
If this is your first time deploying a Cloud Run service in this project, you may be prompted to enable some services.
Enter Y to continue to enable them when prompted.
It then may take several minutes to build and deploy the service. After it is deployed, tou should see output containing the service URL.
Deploying container to Cloud Run service [resonate-server] in project [<your-project>] region [<your-region>]
✓ Deploying... Done.
  ✓ Creating Revision...
  ✓ Routing traffic...
  ✓ Setting IAM Policy...
Done.
Service [resonate-server] revision [<revision>] has been deployed and is serving 100 percent of traffic.
Service URL: <your-service-url>
Now, redeploy the Resonate Server this time setting the --system-url flag with the Service URL.
This lets the Resonate Server know its public address.
gcloud run deploy resonate-server \
  --image=resonatehqio/resonate \
  --region=<your-region> \
  --platform=managed \
  --allow-unauthenticated \
  --port=8001 \
  --args="serve","--system-url","your-server-url"," \
  --scaling=1
Verify the Resonate Server's API is reachable
curl i <your-service-url>/promises
Expect to see this response:
{
  "error": {
    "code": 40000,
    "message": "The request is invalid",
    "details": [
      {
        "@type": "FieldValidationError",
        "message": "the field id is required",
        "domain": "request",
        "metadata": { "url": "https://docs.resonatehq.io/operate/errors#40000" }
      }
    ]
  }
}
This indicates the Resonate Server APIs are reachable.
The Cloud Function will need to talk back to these endpoints; confirming connectivity now prevents later debugging surprises.
Now that you validated HTTPS routing and port mapping on your Cloud Run service you will develop the countdown workflow that we will deploy as the Cloud Function.
Countdown workflow
Clone the countdown example repository, and deploy the code to Cloud Functions.
git clone [email protected]:resonatehq-examples/example-countdown-ts-gcp.git
cd example-countdown-ts-gcp
The Functions runtime automatically installs dependencies from package.json before deploying your handler.
Resonate workflows are plain generator functions.
Registering countdown and exposing the handler means Cloud Functions can receive webhook calls from the Resonate Server and resume the workflow exactly where it left off.
You built the worker code that Cloud Run will execute each time the Resonate Server needs to advance the countdown.
Deploy the Cloud Function
Deploy the countdown worker as an HTTP-triggered Cloud Function. Pass the Resonate Server URL via environment variable.
gcloud functions deploy countdown-workflow \
  --gen2 \
  --region=<your-region> \
  --runtime=nodejs22 \
  --source=. \
  --entry-point=handler \
  --trigger-http \
  --allow-unauthenticated \
  --set-env-vars=\
RESONATE_URL=<your-resonate-server-url>
If this is your first time deploying a Cloud Function in this project, you may be prompted to enable some services.
Enter Y to continue to enable them when prompted.
It then may take several minutes to build and deploy the function.
You will see output similar to:
Preparing function...done.
X Updating function (may take a while)...
  ✓ [Build] Logs are available at ...
    [Service]
  . [ArtifactRegistry]
  . [Healthcheck]
  . [Triggercheck]
Completed with warnings:
  [INFO] A new revision will be deployed serving with 100% traffic.
You can view your function in the Cloud Console here: ...

buildConfig:
...
serviceConfig:
  ...
  uri: <this-is-the-url-you-need>
state: ACTIVE
updateTime: '2025-11-11T18:56:20.810738211Z'
url: ...
Grab the serviceConfig uri value from the output.
Once deployment finishes, note the Function URL and export it:
export RESONATE_WORKER_URL="https://<function-url>"
Cloud Functions Gen 2 share the same underlying infrastructure as Cloud Run, so Resonate can call back into your workflow over HTTPS just like any other webhook.
You published the countdown worker as an HTTP endpoint that the Resonate Server can invoke whenever it needs to resume a workflow step.
Subscribe to a topic
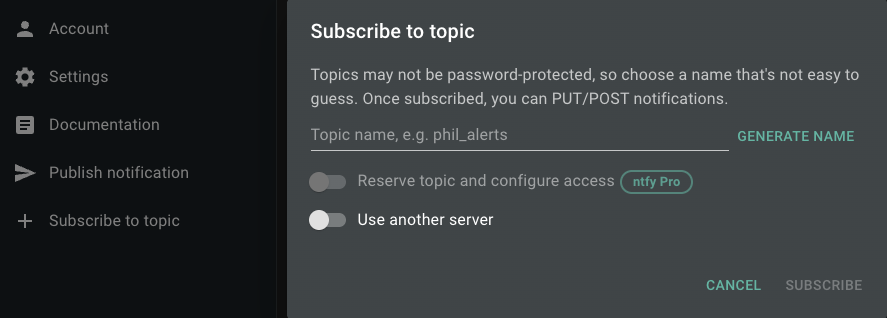
If you haven't already, subscribe to your ntfy.sh topic to receive countdown notifications.
Subscribing to a topic that doesn't exist creates it, so you can use any topic name you like.
Either via the web interface:

Or using the command line:
ntfy subscribe <your-topic>
Trigger a countdown
Start a long-running countdown from your terminal using the Resonate CLI invoke command.
The invoke command creates a new promise on the Resonate Server.
Additionally, it causes the creation of a Task which your Cloud Function worker will claim, telling it to execute the countdown workflow.
resonate invoke countdown-workflow-1 \
  --func countdown \
  --arg 5 \
  --arg 1 \
  --arg https://ntfy.sh/countdown-notification \
  --server https://resonate-server-pg3jsgl5sq-nn.a.run.app \
  --target https://countdown-workflow-pg3jsgl5sq-nn.a.run.app \
The previous command invokes the countdown function with three arguments, and corresponds the function invocation to the countdown-workflow-1 promise on the Resonate Server.
countdown-workflow-1: unique promise ID.--func countdown: which registered function to run.--arg 5: countdown starts at 5.--arg 1: wait 1 minute between notifications.--arg https://ntfy.sh/<your-topic>: destination URL (replace with your ntfy topic or webhook).--server <resonate-server-url>: the Resonate Server URL.--target <cloud-function-url>: the Cloud Function URL. (this tells the Resonate Server where to send messages).
Watch the ntfy topic to see Countdown: 5, Countdown: 4, …, 🚀 Liftoff! roll in.
You can use the promise ID to inspect the workflow via resonate promises get countdown-workflow-1 or in the web browser at https://<your-resonate-server>/promises?id=countdown-workflow-1.
Congratulations! You have a durable countdown application deployed to Google Cloud Run.
While you will be receiving countdown notifications, you can also visualize the countdown execution using the Resonate CLI tree command.
resonate tree countdown.1 --server <resonate-server-url>
Example output (while waiting on the second sleep):
countdown.1
├── countdown.1.0 🟢 (run)
├── countdown.1.1 🟢 (sleep)
├── countdown.1.2 🟢 (run)
└── countdown.1.3 🟡 (sleep)